In this tutorial, we’ll walk through how to create a custom map using a large image in Leaflet, a lightweight JavaScript library for building interactive maps in web applications.
This technique is useful when working with non-geographical maps or images that you want to make interactive, zoomable, and possibly annotated.
Why Use Custom Maps?#
Here are some use cases where custom maps from images are applicable:
- Indoor Maps: This is a common use case—think of malls, airports, or exhibition halls where a visual indoor layout helps visitors navigate.
- Video Game Maps: Many games come with expansive in-game worlds. Custom maps allow for interactive player guides. For example, The Forest Map provides an interactive map for players of The Forest game.
- Zoomable Images: You’re not limited to maps. If you have a large image, such as a blueprint, artwork, or infographic, you can use Leaflet to let users zoom into specific areas without loading the entire image at once. You can even add markers or annotations for more context. (ex. ESO’s 9-gigapixel zoomable image of the Milky Way galaxy, even though this is using HTML5 canvas, you can also make something similar using Leaflet. )
Preparation and Setup#
Before we begin, make sure you have the following tools installed:
- Geospatial Data Abstraction Library (GDAL) – a powerful library for reading and processing raster and vector geospatial data.
- Python 3 (with GDAL Python bindings)
- npm – for setting up and running our web application.
Installing GDAL and Python#
If you don’t have GDAL installed yet, the recommended method (which we’ll use in this tutorial) is via Anaconda or Miniconda. This approach is beginner-friendly and includes the required Python bindings out of the box.
I would recommend checking out this step-by-step GDAL installation guide for installing GDAL with Anaconda
While there are other installation methods available (e.g., via Homebrew, apt, or pip), using Anaconda ensures fewer compatibility issues.
Tiling The Image#
Getting the Sample Image#
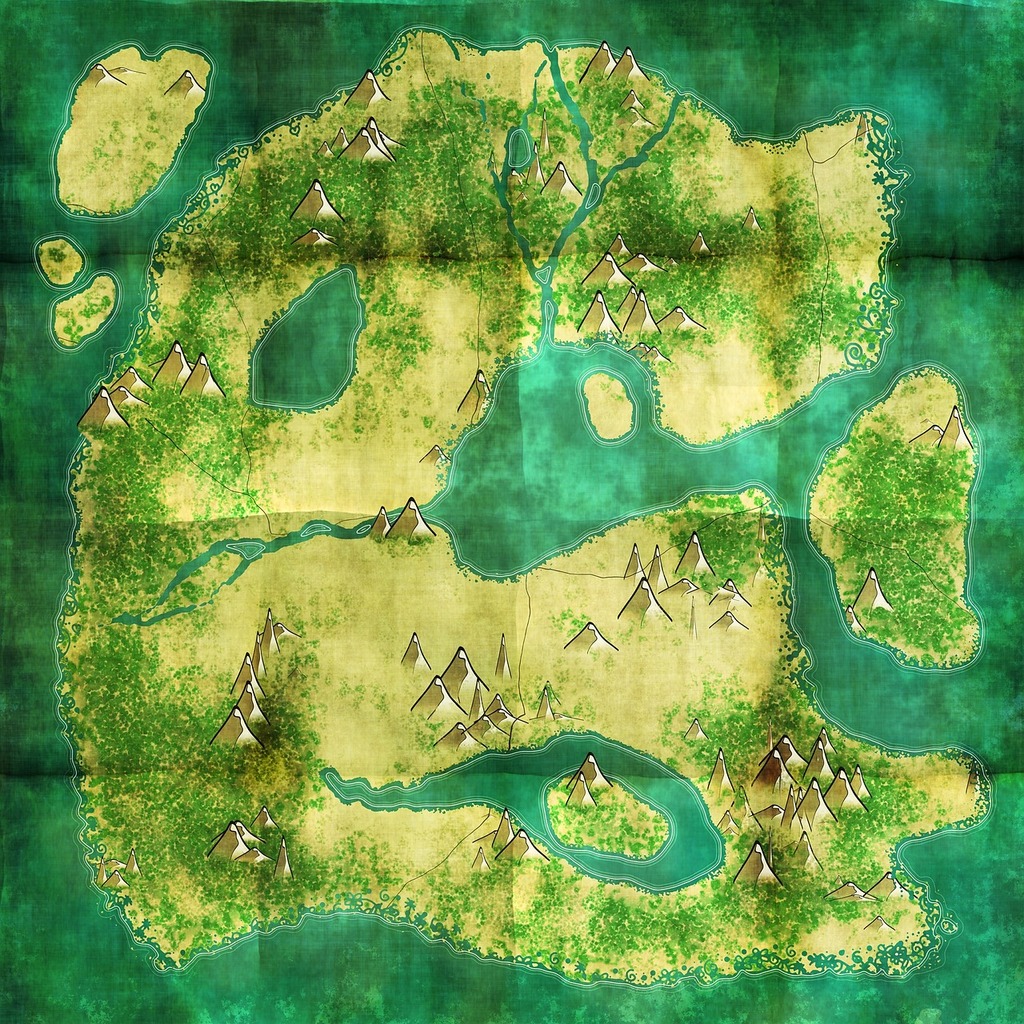
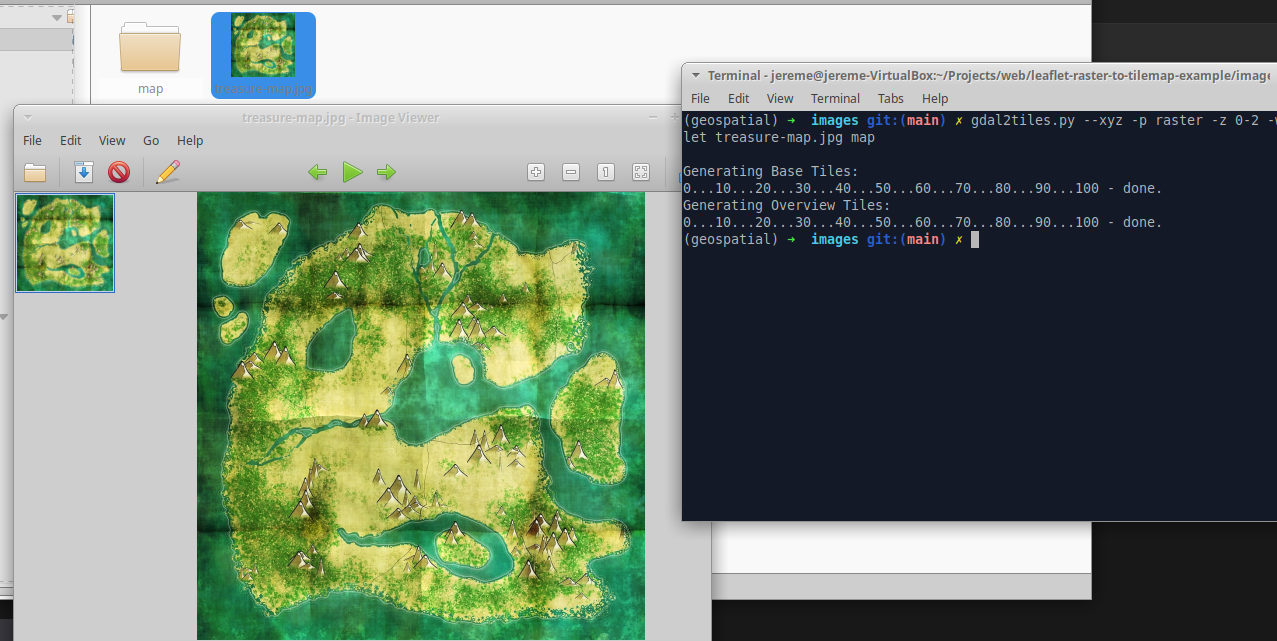
For this tutorial, we’ll use a sample image named treasure-map.jpg. You can simply just right click the image above then save it to your project folder. You can also substitute this with your own image, keeping in mind the recommendations regarding image dimensions discussed later.
Tiling with gdal2tiles.py#
Assuming that you’ve followed the provided step-by-step guide for installing GDAL earlier, be sure to activate the conda environment:
conda activate geospatialNow, let’s generate the image tiles. We’ll use the following command:
gdal2tiles.py --xyz -p raster -z 0-2 -w leaflet treasure-map.jpg map/Let’s break down each parameter:
--xyz: This crucial flag ensures that the generated tile coordinates are compatible with common web mapping libraries like Leaflet. Without--xyz,gdal2tiles.pydefaults to TMS (Tile Map Service) coordinate system, which can result in jumbled or incorrectly displayed tiles in Leaflet.-p raster: This parameter simply indicates that our input file is a raster image.-z 0-2: This specifies the zoom range for tile generation. We are generating tiles from zoom level 0 (the most zoomed-out view) up to zoom level 2 (more zoomed-in). Generating more zoom levels will create a larger number of tile files, but it allows for greater detail as the user zooms in.-w leaflet: This parameter specifies the desired web viewer. Whilegdal2tiles.pydoesn’t strictly generate a full-fledged web viewer for Leaflet (you’ll still need to write some HTML/JavaScript for that), setting it toleafletprevents the generation of files for other map web viewers that you might not need. You can also set this tononeif you prefer to avoid generating any viewer-specific files.
For a complete list of options, refer to the official gdal2tiles CLI documentation.
Understanding Zoom Levels and Image Dimensions#
The choice of zoom levels is directly related to your image’s dimensions. Web map tiles typically have a size of 256x256 pixels. Each subsequent zoom level doubles the resolution of the previous level, effectively quadrupling the number of tiles needed to cover the same area.
The table below illustrates the relationship between the zoom level and the size of the area covered by a single tile at that level:
| zoom level | size(px) |
|---|---|
| 0 | 256 |
| 1 | 512 |
| 2 | 1024 |
| 3 | 2048 |
| 4 | 4096 |
| 5 | 8192 |
Since our treasure-map.jpg is 1024x1024, the maximum recommended zoom level is 2. Going beyond this ideal zoom level would not add further detail but might simply stretch or pixelate the image, affecting its quality.
This can be calculated based on the size of a leaflet tile which is 256px and has each square size increasing based on the power of 2.
imagesize = max(height, width)
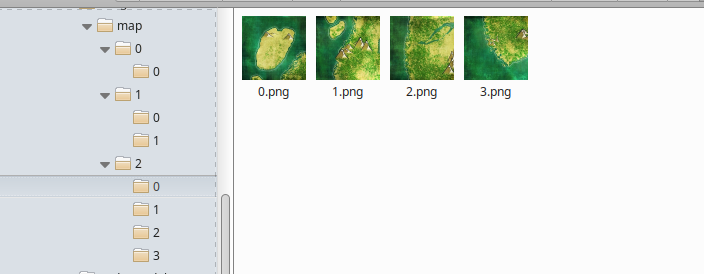
ceiling( log(imagesize / tilesize) / log(2) )After running the gdal2tiles.py command, you will find a map/ directory containing subdirectories for each zoom level, and within those, individual image tiles. We’ll be using these tiles in our web mapping application, such as Leaflet, by pointing the map’s tile layer to the map/ directory.
Creating the Web Application with Vite and Leaflet#
Now that we have our image tiles, let’s build a simple web application to display them using Vite and Leaflet. Vite provides a fast development experience with features like hot module replacement and a local development server.
Initialize the Project with Vite#
First, navigate to your desired projects folder in the terminal and create a new Vite project. We’ll use the vanilla template for a basic setup. You can name your project anything you like; here, we’ll use my-leaflet-app:
npm create vite@latest my-leaflet-app -- --template vanillaThis command will create a new directory named my-leaflet-app (or whatever you specified). Follow the on-screen instructions, which will typically guide you to:
Change into the new project directory:
cd my-leaflet-appInstall the project dependencies:
npm installStart the development server: This will open your application in a browser, and it will automatically reload whenever you make changes to your code.
npm run dev
Install Required Packages#
Next, we need to install the core libraries for our map application:
leaflet: The popular open-source JavaScript library for interactive maps.leaflet-rastercoords: A useful utility for projecting pixel coordinates from our image to Leaflet’s map coordinates.
Install them using npm:
npm i -S leaflet leaflet-rastercoordsCreating the Map#
Now that our project is set up and dependencies are installed, let’s clean up the default Vite code and start building our map.
- Clean up
src/main.jsandsrc/style.css: Remove all existing content from these two files. - Add Styles to
src/style.css: Add the following CSS to style our web page and the map container:
| |
We've defined a `div` with the ID `app` where our map will be rendered.
- Initialize the Map in
src/main.js: Now, let’s add the JavaScript code tosrc/main.jsto create and display our Leaflet map.
| |
Copying the Tiles to the Public Folder#
For our Vite development server to serve the generated map tiles, we need to copy the map/ folder (created in the previous gdal2tiles.py step) into the public/ directory of your Vite project.
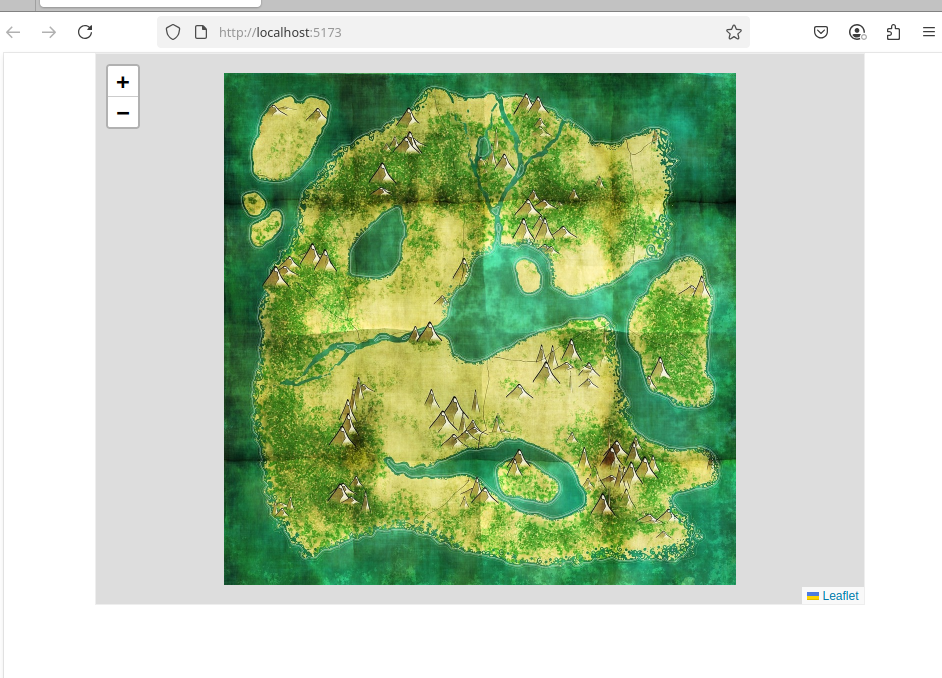
If your local development server (npm run dev) is still running, you should now be able to see your treasure-map.jpg image displayed as a zoomable map in your browser!
Projecting Coordinates with leaflet-rastercoords and L.CRS.Simple#
In our main.js, you might have noticed the following lines when initializing the map:
| |
Here’s why leaflet-rastercoords and CRS.Simple are essential for working with custom image maps:
Understanding Coordinate Reference Systems (CRS)#
Typically, web maps use a geographic coordinate system (like EPSG:3857, also known as Web Mercator) to represent real-world locations. However, for our custom image map, we’re not dealing with geographic coordinates (latitude and longitude). Instead, we’re working directly with the pixel coordinates of our image. This is where CRS.Simple comes in. It’s a special, non-projected coordinate reference system provided by Leaflet that treats pixel coordinates as its primary unit.
CRS.Simple’s origin starts at the top left corner of the map (0,0) and the X and Y coordinates increase as you move to the right and down respectively. This setup aligns with how pixel coordinates are typically referenced in most photo editing software.
For more in-depth guides and examples, check out the Leaflet’s official post regarding non-geographical maps
The Role of leaflet-rastercoords#
While L.CRS.Simple provides the foundation, leaflet-rastercoords significantly simplifies the process of integrating our image with Leaflet’s map functions. This utility library makes it easy to convert between your image’s raw pixel coordinates.
This library also automatically handles the map boundaries so that cannot scroll endlessly outside the bounds of your image, as it sets the pan limits.
This means you can easily work with the familiar pixel coordinates from your image (e.g., obtained directly from a photo editing software like GIMP or Photoshop) and convert them to map locations for adding markers, polygons, or other interactive elements.
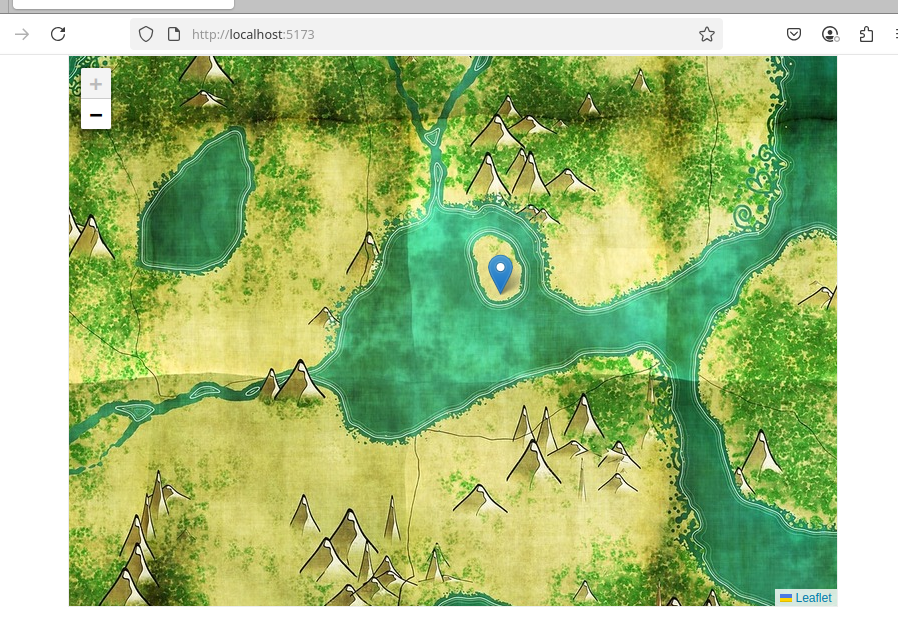
For example, if you want to place a marker at pixel coordinates X: 611, Y: 433 on our sample image treasure-map.jpg, you can do so by using rc.unproject() to set the coordinates:
L.marker(rc.unproject([611, 433]), { icon }).addTo(map);After adding this line and refreshing your browser (or if Vite automatically reloads), you should see a marker appear and the coordinate based the Y and X coordinates.
Conclusion#
In this tutorial, we have created a custom zoomable map in Leaflet from an existing image. This setup provides a foundation for building more custom image-based maps. Feel free to experiment by using different images, and adding more layers such as markers and shapes while exploring other leaflet functionalities as well.
You can find the complete source code for this project at the GitHub Repository: Leaflet Raster to Tiles Example
Zoomable images with Leaflet - I used this as the basis for my earlier project for an earlier project back in 2013. Maptiler was used on that project instead of gdal2tiles.py.
Cover Image by Pexels from Pixabay