Ever wanted to build your custom cross-platform map applications without relying on traditional geographic data?
In this guide, we’ll be creating a custom map using a large image in Flutter, an open-source development kit for creating cross-platform applications. Instead of using geographical map sources, we’ll be using our own images to create non-geographical maps. Using the same technique from the previous topic, we’ll be able to create custom maps that support other platforms.
This opens up possibilities for mobile apps, interactive desktop tools, and even embedded systems, leveraging Flutter’s cross-platform capabilities. This allows for applications like indoor maps, game maps, or interactive high-res images, all within a cross-platform Flutter app.
The library we’ll be using is to create maps is flutter_map . Similar to Leaflet, flutter_map offers a similar API and tile-based approach to mapping.
Preparation#
For this project, we’ll need the following tools:
- gdal2tiles.py - for processing images into map tiles.
- Flutter SDK - our tools for developing apps.
- any image editor like GIMP or Photoshop (even Paint works)
- npm - for installing additional tools needed later
This tutorial assumes basic familiarity with gdal2tiles and Flutter, but beginners are still welcome to follow along.
If you’re new to gdal2tiles or need a refresher on installing and processing images into map tiles, please refer to my detailed tutorial on Custom Map from Images in Leaflet.
For a step-by-step guide on how to install Flutter, head over to the Official Documentation . Google also provides some codelabs that can help you get started with the basics.
Creating the App#
Step 1: Download the Sample image#
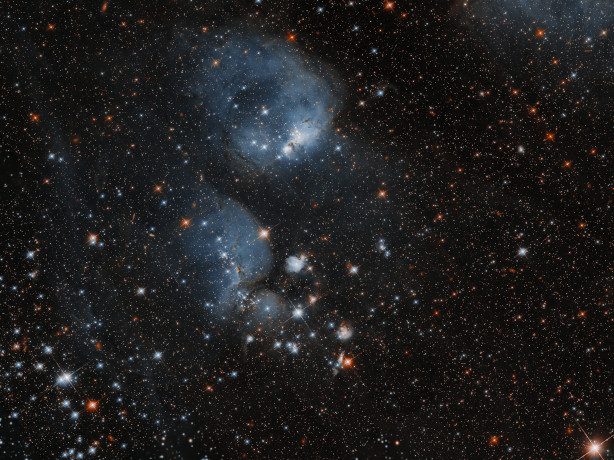
For this tutorial, we will be using a sample image which can be downloaded here. Please the image in a folder for processing. This high-resolution image of space serves as a good example of a large, non-geographical image suitable for custom mapping.
Step 2: Generate the Map Tiles#
Before we create our map tiles, let’s first compute for the optimal zoom level. You can use the following formula to compute that:
imagesize = max(height, width)
ceiling( log(imagesize / tilesize) / log(2) )
tip
If you’re on a web browser you can simply just enter the following JavaScript code in your console. Given that our sample max image size is 6143px and the default tile size is 256px:
Math.ceil( Math.log(6143 / 256) / Math.log(2) );
Using this computation, we should get a result of 5. We can now use the zoom level to generate our tile:
gdal2tiles.py --xyz -p raster -z 0-5 -w none hubble_gas_cocoon.jpg map_tiles/Here is a sample demonstration on how the command is executed:

Step 3: Create a new Flutter App#
In our terminal, enter the new Flutter project. You can name it whatever you like:
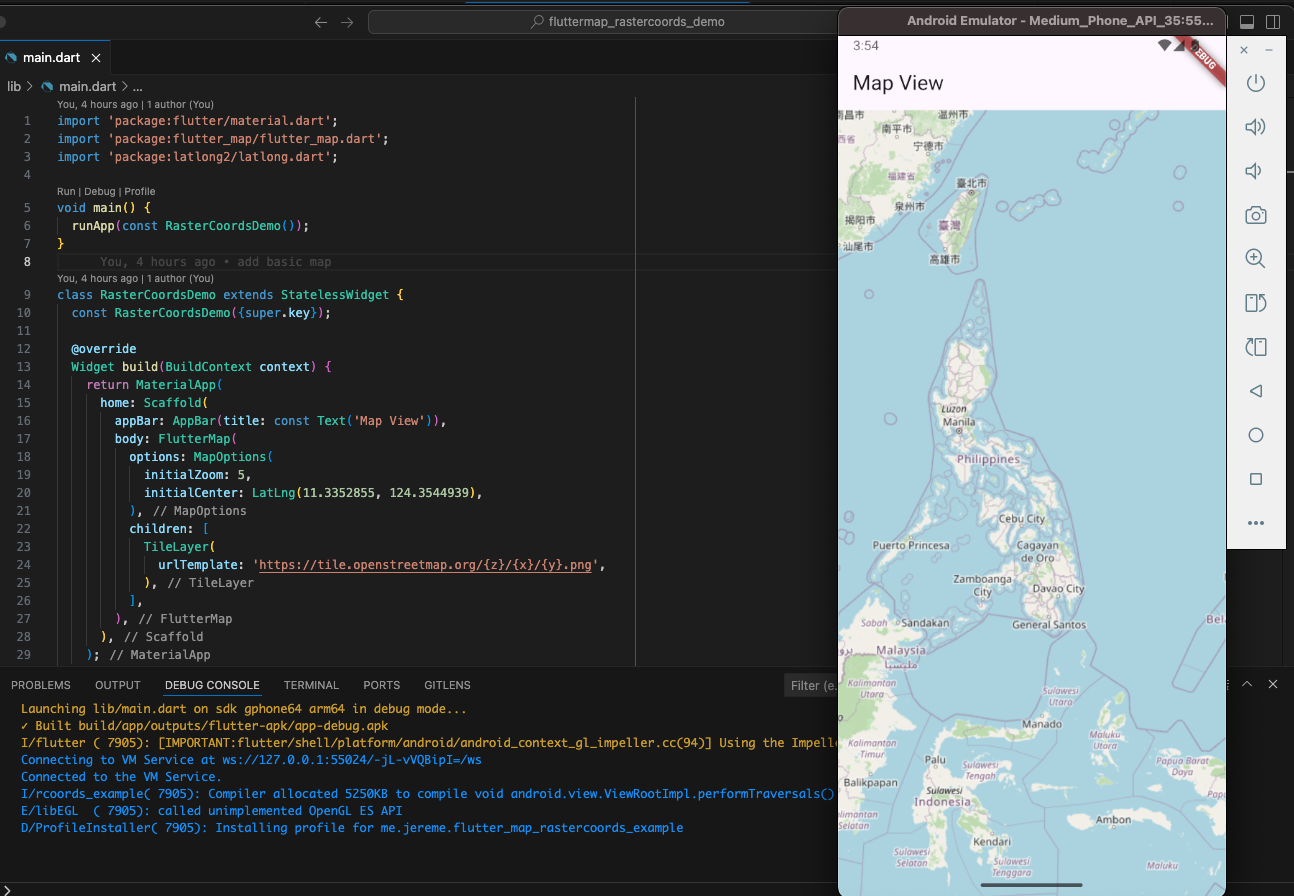
flutter create my_map_projectThis should create a Flutter app with a default sample application.
After creating a new project, Flutter includes a sample counter app under lib/main.dart. Let’s remove all these, including the test file test/widget_test.dart.
Step 4: Add the Dependencies#
Navigate into your newly created project directory:
cd my_map_projectOpen the pubspec.yaml file and add the following dependencies:
| |
Next, fetch the dependencies we added.
flutter pub getHere we added the following packages to our project.
flutter_map- as mentioned earlier, is a library for creating map widgets in flutter.- latlong2 - needed for creating
LatLngobjects
Step 5: Create the Basic Map#
We’ll be creating the basic app along with a map.
| |
For now, we’ll be using OpenStreetMap as our placeholder just to check if the application is running. You can start the application on any platform, though I’d recommend using Android as the target platform to be consistent with this guide.
If you encounter any issues relating to network connections, please refer to the Flutter documentation on Networking.
Step 6: Start the Map Server#
Install serve , a tool for serving static files locally.
npm i -g serveThis should make the serve command available in your terminal.
Go back to the parent directory of map_tiles , where we ran gdal2tiles to generate our map tile images, and run the following to start the local server:
serve -l 8080For web target builds, you can also add the --cors option to enable CORS on your local server.
You should be able to open the local server in the browser when you open http://localhost:8080.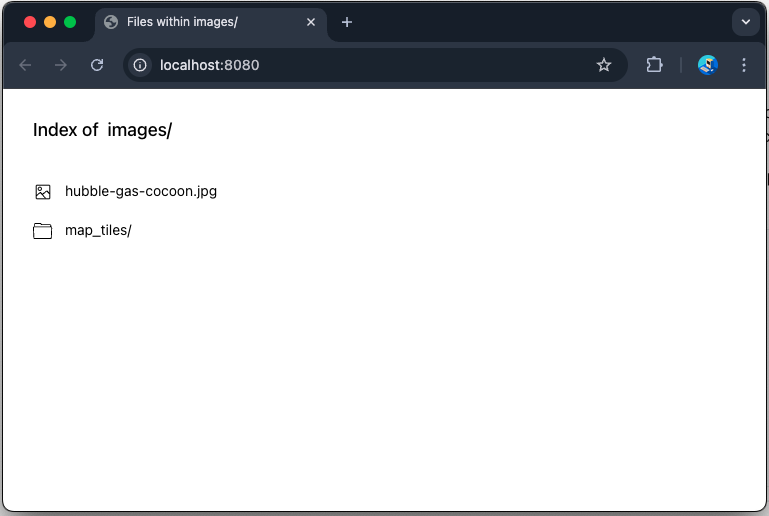
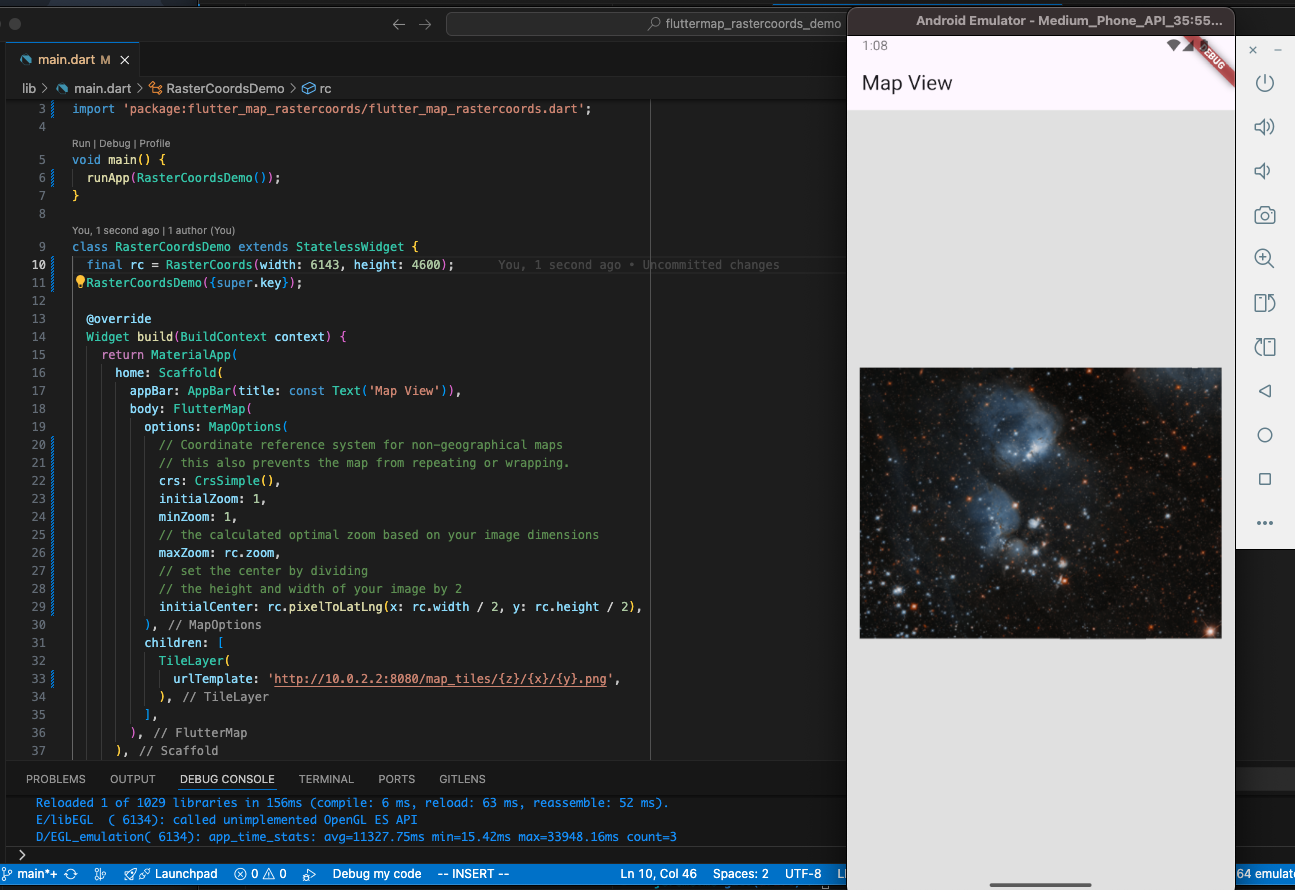
Step 7: Add our custom Map#
Now that we have a running web server. We can use the following URL Template
http://localhost/map_tiles/{z}/{x}/{y}.pngWhen accessing the local server from an Android emulator, replace localhost with 10.0.2.2
Before we make some changes, we need to flutter_map_rastercoords to our pubspec.yaml file:
dependencies:
  # ... existing dependencies
  flutter_map_rastercoords: ^0.0.4
Similar to leaflet-rastercoords, flutter_map_rastercoords is a plugin for flutter_map that makes it easier to project pixel coordinates into the map’s latitude and longitude coordinates.
Run flutter pub get again to download the new package.
Then proceed with the main.dart changes:
| |
When running, you should now be able to view the application on the emulator.
To simulate pinch for zooming in and out on the emulator, hold the Ctrl (or cmd key on mac ) then drag the mouse on the screen.
You can learn more about the methods and properties included in RasterCoords class, from the Documentation
Step 8: Keeping the Map in Place#
So you might have noticed that you are able to drag outside the image. To prevent this from happening. Let’s add some constraints to the MapOptions:
| |
With this, you should no longer be able to scroll farther from the image.
Step 9: Adding Markers#
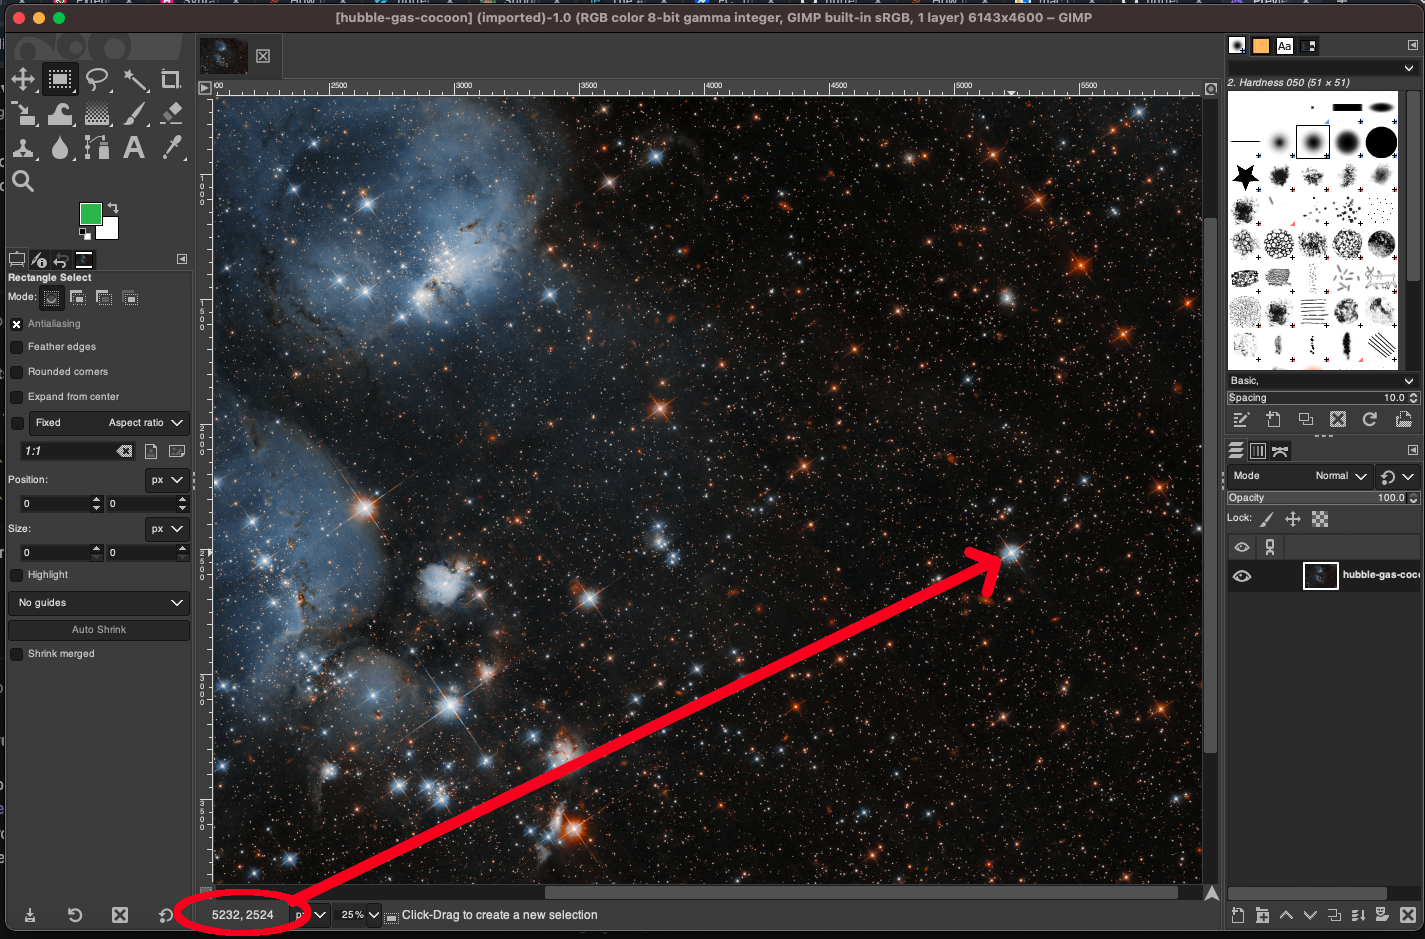
Getting the Coordinates#
We’ll be demonstrating projecting pixel coordinates into map coordinates by adding markers. We’ve demonstrated this before by setting the initialCenter of our MapOptions.
First, open the original image using any Photo editor. Use the cursor or info tool in your image editor to read the pixel coordinates (x, y) at the point you want to use.
Creating the Marker#
For adding markers, append a marker layer right below the TileLayer, which is in the children property of our FlutterMap widget.
| |
When running the marker should now be visible on the coordinates we selected.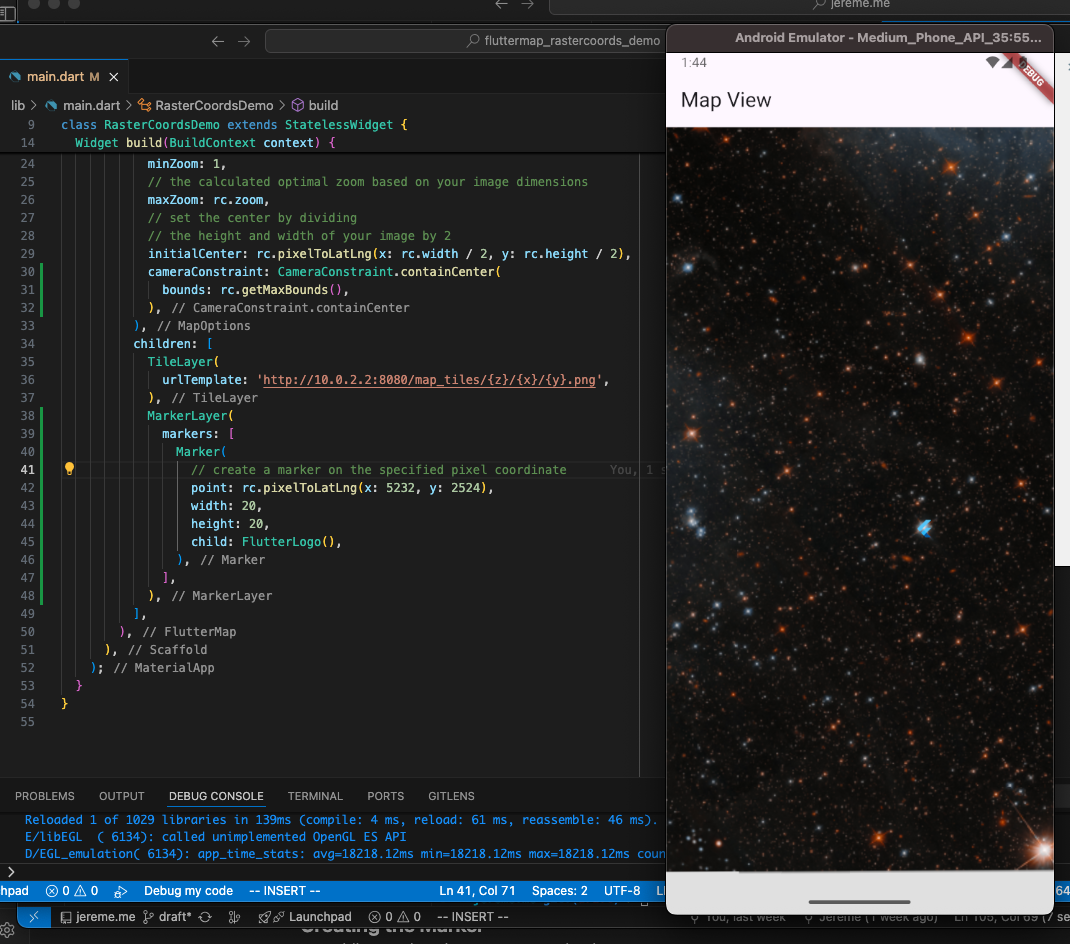
Conclusion#
In this guide, we have created a custom non-geographical map in Flutter using an existing image. From here you’ll be able to create cross-platform applications that uses custom image-based maps. Try to explore the API of flutter_map and flutter_map_rastercoords and also try building for other platforms as well.
The sample code used in this tutorial is available at the Github Repository: Flutter Map Rastercoords Demo
- Cover Image by Gerd Altmann from Pixabay
- Sample Image by NASA Hubble Telescope